 All blogs end up with broken links eventually. The older your blog is, the more likely it will have a broken link somewhere–in a comment, in a redirect, in an affiliate link or something else. The link could have been a good one when it was created and then the referenced site or webpage could have moved or the domain name might have expired.
Whatever the reason, it is important to keep broken links cleaned up not only for your readers, but for the search engines as well. If you have been blogging for a while and have hundreds or even thousands of links within your blog posts, comments, images and pages, you have to have a mechanism to uncover broken links.
Two Ways to Find and Fix Broken Links
Google Webmaster Tools — Since broken links are a problem when Google or other search engines “crawl” your site, Webmaster Tools provides a list of broken links. First create a Webmaster Tools account with Google if you don’t already have one. Next add your site and follow the instructions to verify it. Google will need time to crawl your site and index your pages and if it finds broken links, they will be listed under Health>Crawl Errors. Once you have fixed them, mark them as fixed and they will be removed from the list. If they have not really been fixed, they will show up again next time Google crawls the pages containing the links in question.
Broken Link Checker Plugin — Another easy way to find and fix broken links is with the Broken Link Checker plugin. This is a free plugin and can be downloaded and installed from the Plugins section within WordPress or downloaded from the WordPress.org directory.
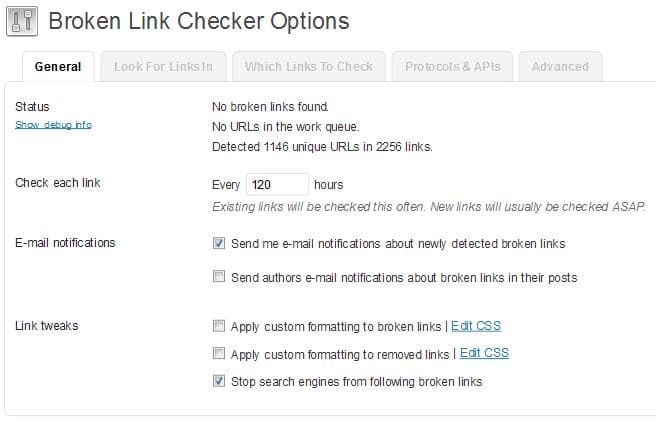
Once the plugin is installed and activated, you’ll find the options under Settings>Link Checker
Most of the default settings will probably work fine, but there are several options you can tweak such as how often to check existing links. New links will be checked right away. You have the option to make the broken links look different and to stop the search engines from following the broken links.
You can choose the time limit for determining a broken link. For example if you set the limit to 30 seconds, then a link will be considered broken if the page takes more than 30 seconds to load.
Once the plugin is activated, it will begin looking for links. Depending on the size of your blog, this could take an hour to complete. Broken links will show up in a new tab under Tools called Broken Links. You’ll see a number of broken links in the sidebar menu (similar to Comments or Updates).
I recommend that you select the option to have a report emailed to you. That makes it very easy to know when corrections are necessary.
The Broken Links tab will list the link, the problem encountered and which page on which the link is located. You can actually take some corrective action directly from this tab. NOTE: I encountered a problem once using the bulk action feature, so now I only make corrections one at a time. You might want to make sure you have a recent backup before correcting links from the Broken Links tab.
From this tab you can:
- Edit the URL — if, for example, you had used a raw affiliate link that is no longer valid, you could replace it with a redirected link.
- Unlink — this is handy for broken links in comments where you could leave the text, but simply remove the link behind the text.
- Not Broken — if you know for sure that the link is not broken, you can mark it as such. Perhaps the page happened to take longer to load when the link was checked.
Broken links need to be corrected to eliminate search engine crawl errors and to avoid sending your readers down a dead end alley. I recommend using both Webmaster Tools and the Broken Link Checker plugin.


